I'm a hippy at heart.
When you look through the invitation collections here at Download & Print I think you'll find designs that appeal to just about everyone's taste. I try to design with you in mind, and you like everything from flowers to vintage, all the colors in the rainbow, and are having beach weddings, destination weddings and black tie events. The invitations are vast and varied.
Of course I love all of the invitations since I am the designer, and I wouldn't share them with the world if I didn't love them. But I will admit, I love the ones with a boho vibe just a little more. If I were playing wedding "Clue" the answer would be Anna Skye, in the garden, with a feather. I love me a little whimsy.
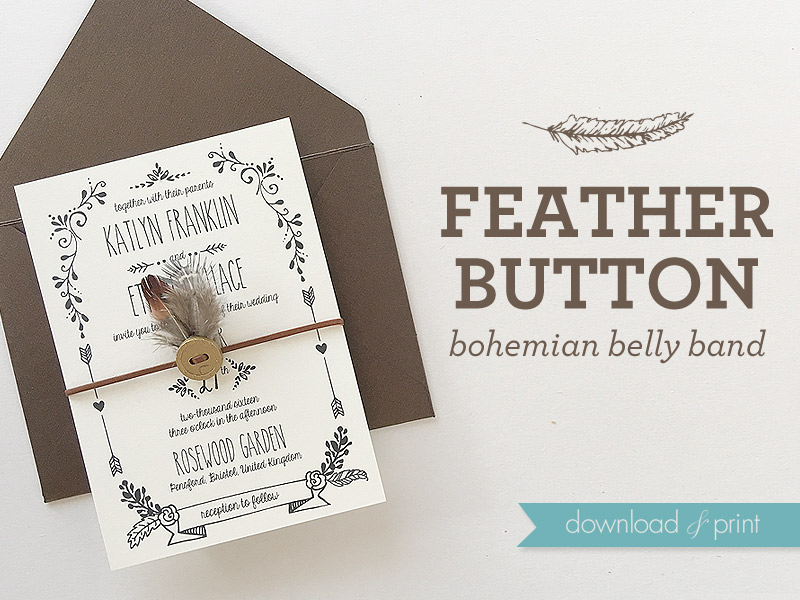
So today's tutorial is right up my alley. I've taken a ghastly neon button, added a little spray paint, a couple of feathers, and voila, created something close to my hippy heart.
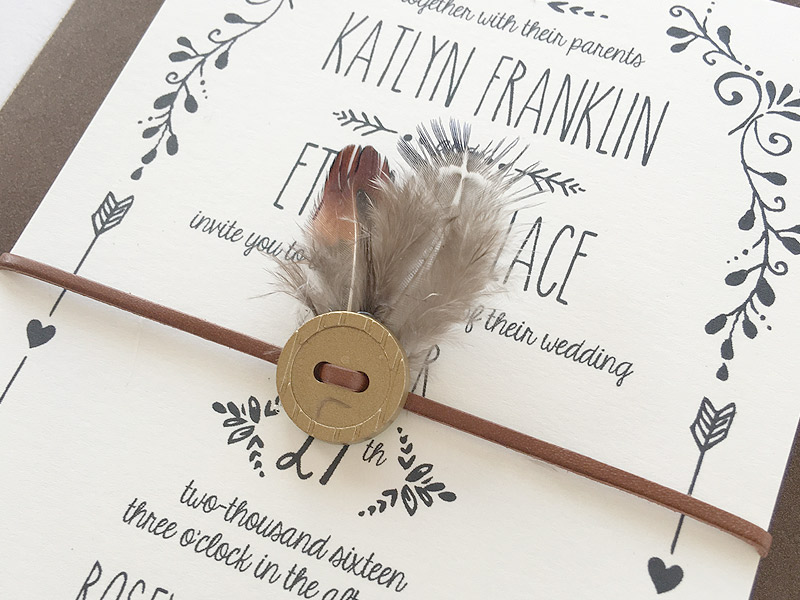
This belly band is easy and economical (I've given you a splurge option too) and is a match made in Heaven with our Doodle Love invitation.
I've gone with an earthy color scheme; black and white invitation, gold button and brown feathers. You could add a pop of color with the button, or try mixing a turquoise feather with a brown feather.
Make love and/or invitations, not war.
SUPPLIES:
- Leather lace
- Pheasant feathers
- Buttons
- Hot glue gun
- Scissors
- Gold spray paint
- Optional - Doodle Love Invitation Collection
Step 1: Spray Buttons
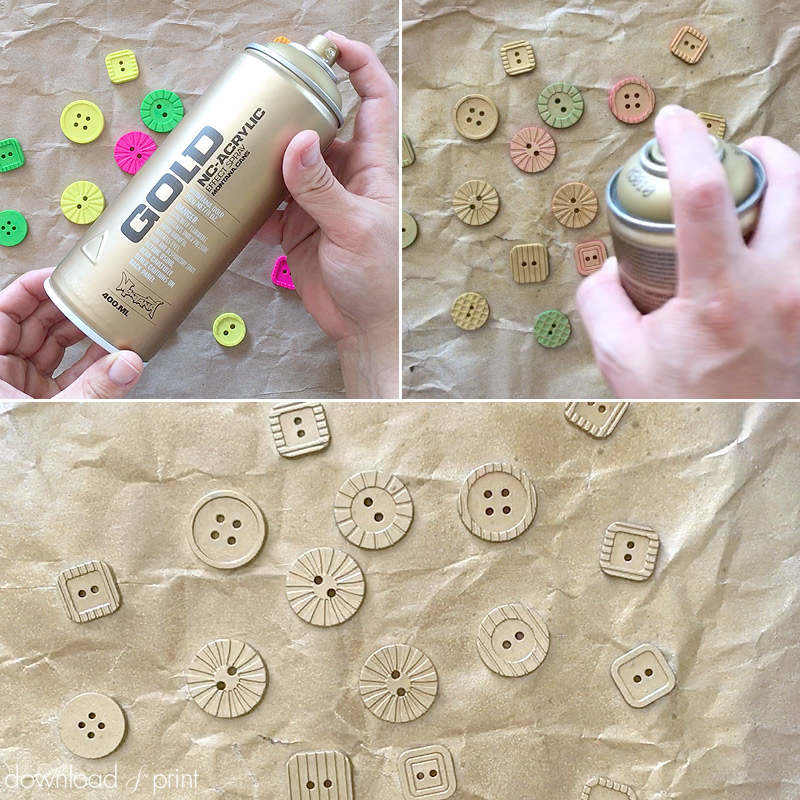
Lay your buttons on a piece of card in a well ventilated area and spray them gold. Light, sweeping strokes work best as this will help avoid drips.
I'm using a packet of bright and cheap plastic buttons as this is the most economical way to buy buttons. Any two or four hole buttons will work well, look for buttons with interesting textures and patterns.
You only need to paint the front and sides of the buttons.
SPLURGE: Upgrade the buttons to wooden buttons and skip this step entirely.
Step 2: Thread
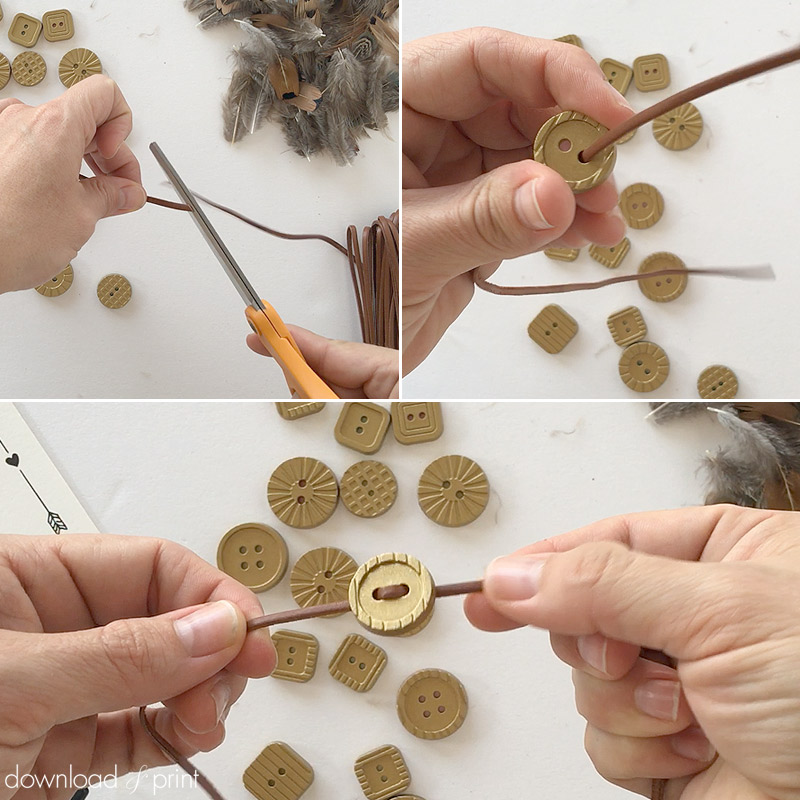
Cut an 18" string of leather and thread one button onto the leather. Slide the button to the center.
You want the leather tails to come from the back of the button.
PRO TIP: Cut the leather on the angle creating a sharp point. This will help when threading.
Step 3: Add Feathers
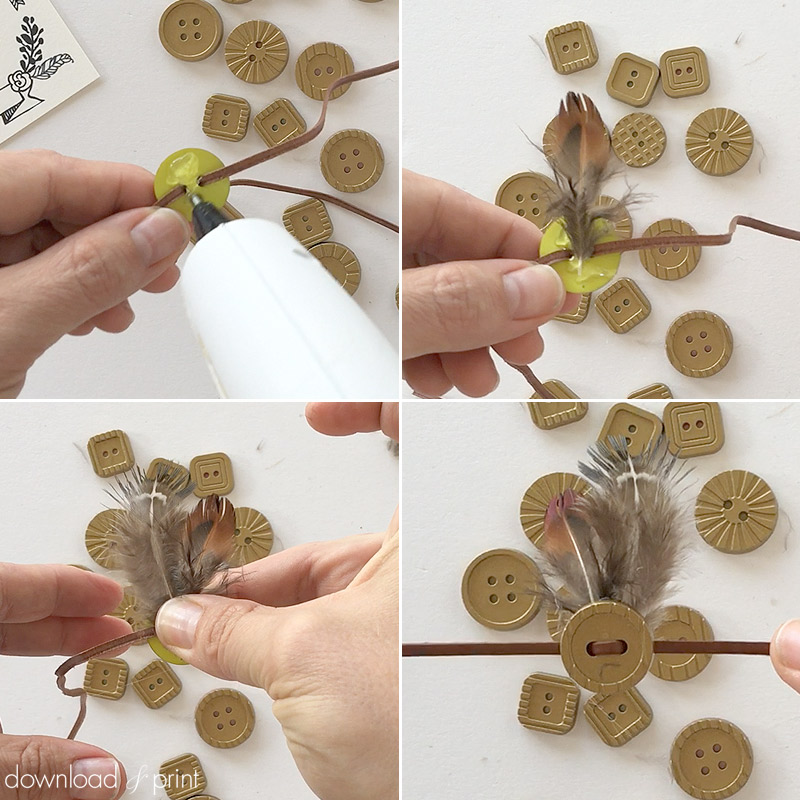
Put a line of hot glue on the back of the button and press down two feathers. Hold with your fingers for a few seconds to ensure good adhesion.
Step 4: Finish
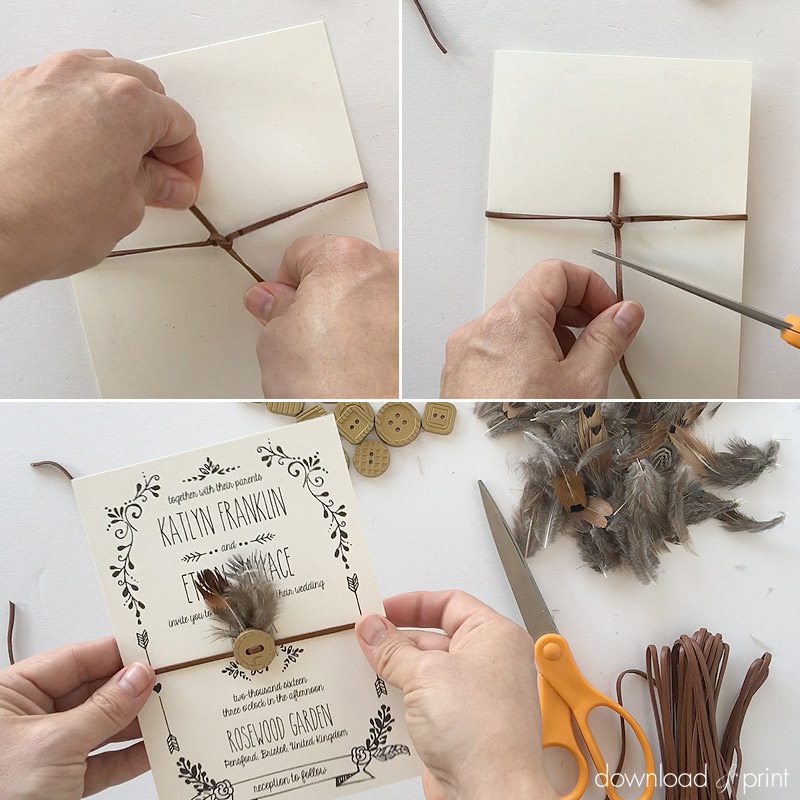
Tie the belly band around an invitation using a simple knot. Trim the leather tails.
Slide your RSVP card and envelope, and any enclosure cards you have into the band.
I'm using the invitation and RSVP from my Doodle Love collection.
View Doodle Love Invitation collection >
YOU MAY ALSO LIKE:
Button & String Invitation Pocket
View Tutorial
Whimsical Ribbon Stitch Invitation
View Tutorial
Easy No-Sew Fabric Belly Band
View Tutorial
With template love,
(Although all the products listed in this tutorial are products I personally use, I will be compensated just a tiny bit if you make a purchase through some of the links provided. Thanks for supporting small biz!)

