Sugar and spice and all things nice. That's how I'd describe this bridal shower invitation.
It has the sweetest sculptured wedding dress, you can skip down below to see how easy this is to make.
The invitation is simple, giving the dress room to shine. The dress is raised up from the invitation using stick-on foam squares. This adds dimension to the invitation, making the overall appearance a little less "simple".
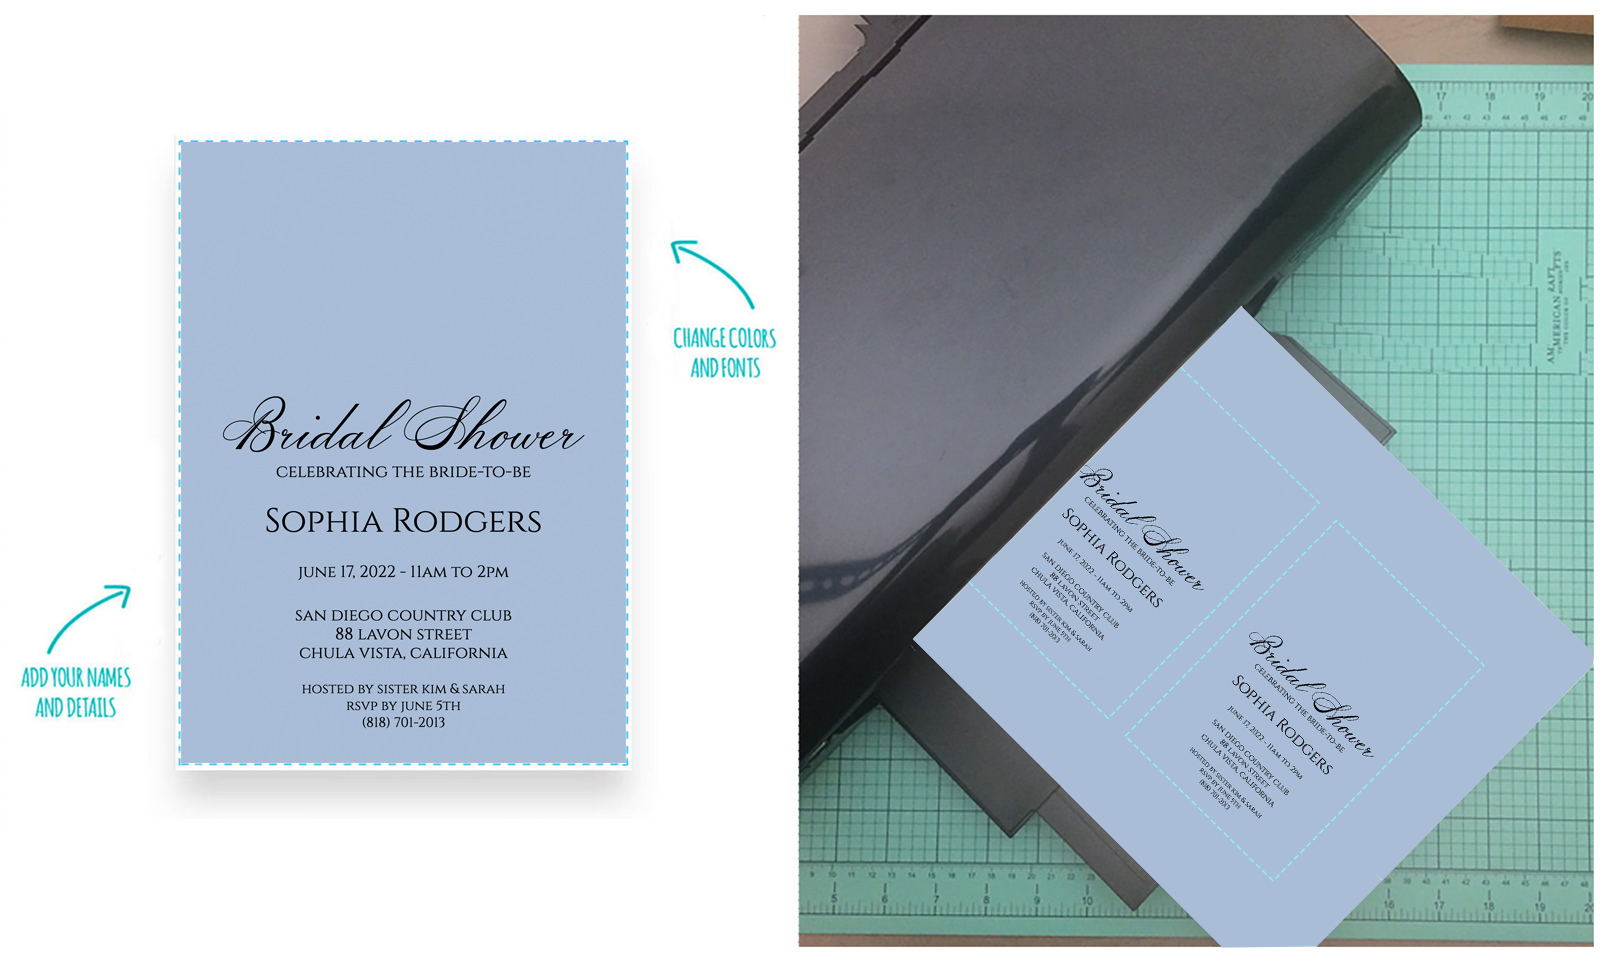
Change the text, fonts and colors online of this free printable invitation template using the link below, then download and print at home. Print as many copies as you need and make sure you double check the spelling. Once you make the wedding dress, you now have yourself a completely custom, completely adorable, invitation.
The invitation prints in black and white, so you can print on any color paper that you like. This gives you control to choose the color scheme. I'd recommend using a fairly light paper, anything too dark will make the text hard to read. You can also choose any color ribbon to adorn the dress, giving you the opportunity to create the invitation in your bride's two chosen colors.
This is definitely one of my projects that is even better to touch and feel than it looks on screen. The added dimension to the dress really pops, and it's just so darn cute. A little time and effort, and of course your handmade love, turns into an easy and simple way to honor your bride.
customize Shower Invitation Template online >
SUPPLIES:Customize Invitation Template
- White or colored card stock
- Paper trimmer or scissors
- Printer - I like Epson printers
- 1/8" satin ribbon
- 2.25" Scallop punch
- Dual adhesive foam squares
- Bone folder
- Free 5x7 Invitation template (customize online)
Step 1: customize online, save, Download & Print

Print the file on card stock. I like paper between 65 lbs and 90 lbs. This is heavier than regular copy paper, but not so thick that it will jam your printer.
My invitation is printed on pale blue paper. You can use any color that you like, even white will work as the dress is raised above the paper creating shadows that give definition. Don't use paper that is too dark though as this will make the black text hard to read.
customize Free Invitation Template online >
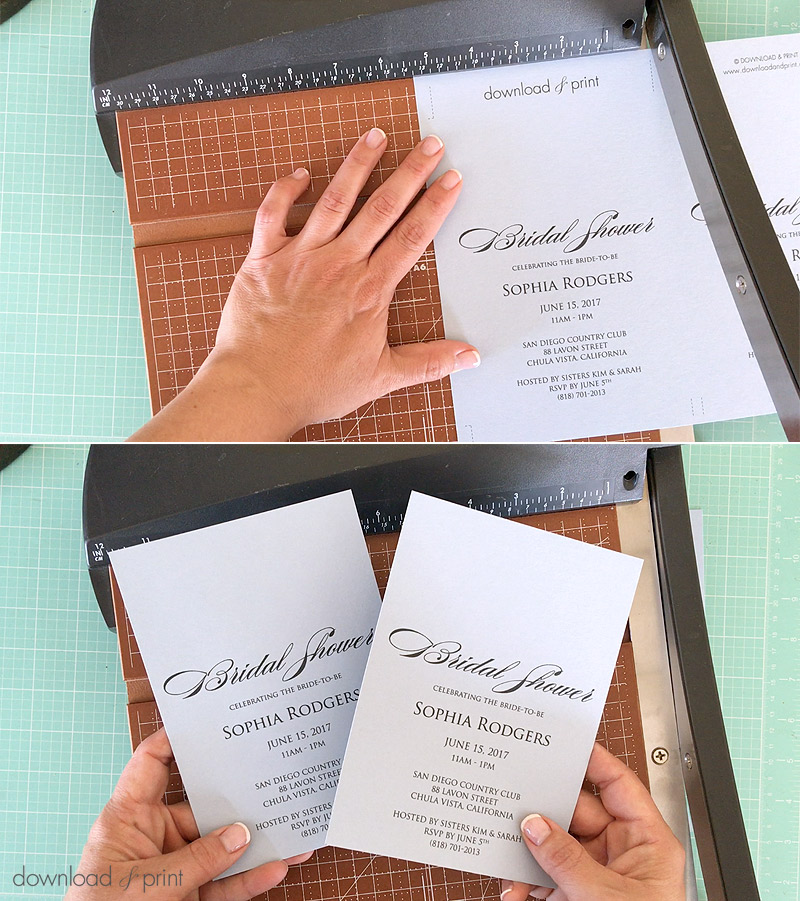
Step 2: Trim

Trim the invitations along the dotted lines using a paper cutter or scissors.
A paper cutter will give you straighter cuts and allows you to cut more than one sheet at once.
Step 3: Make Dress

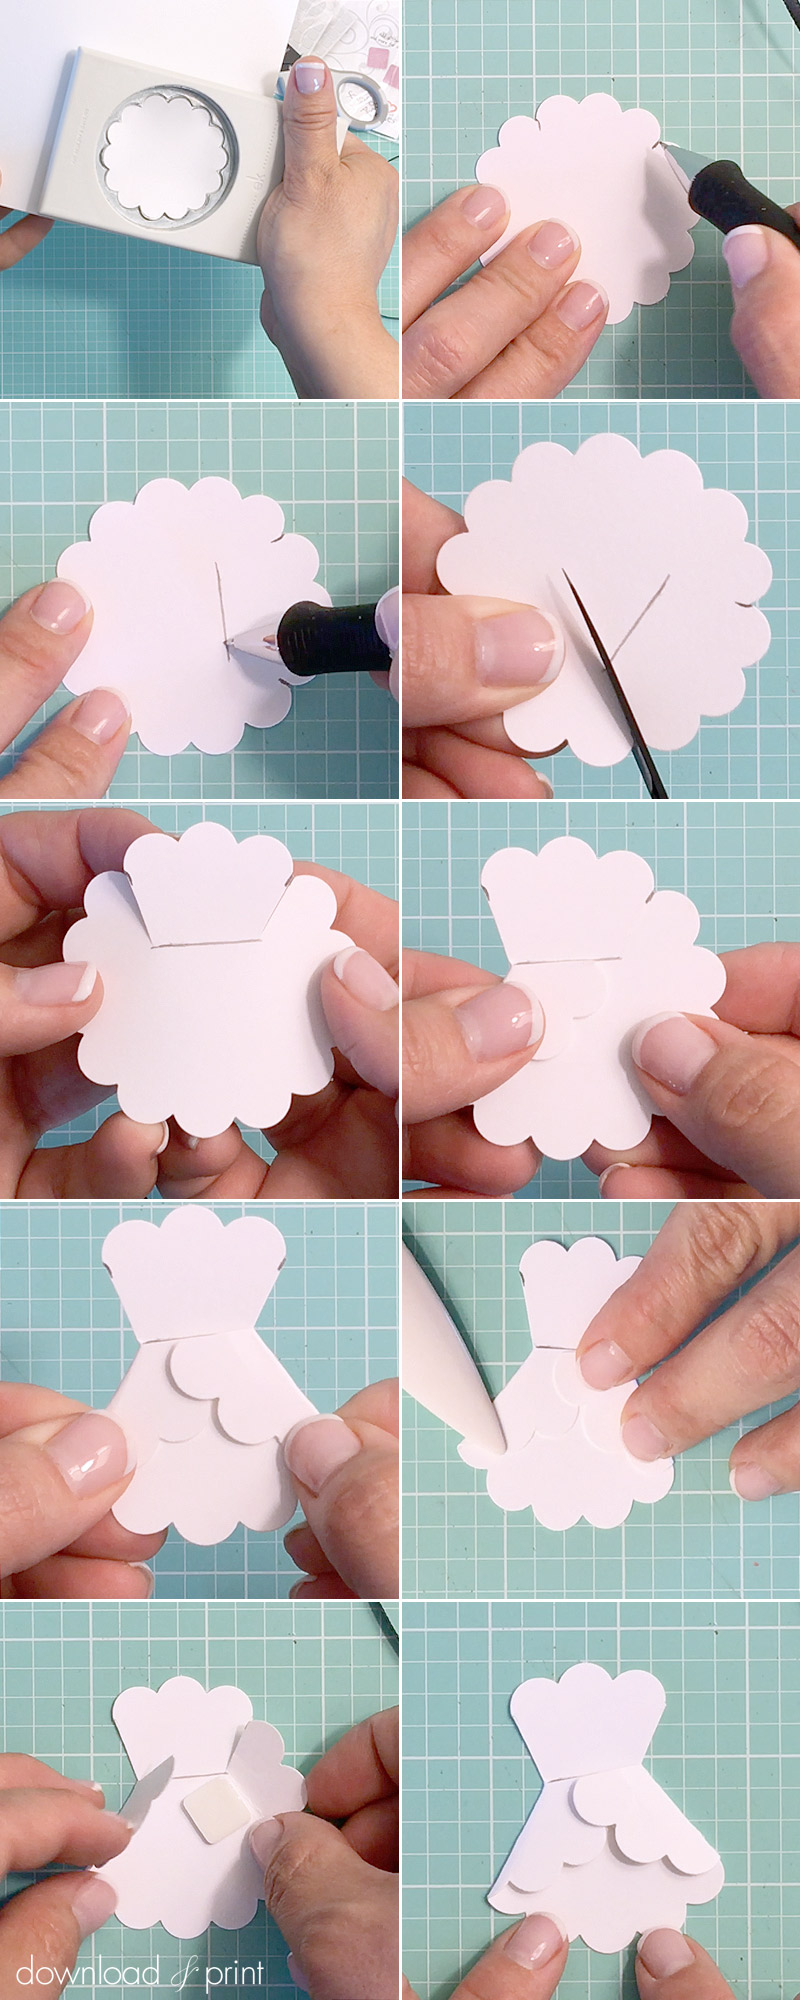
Punch a scalloped circle on white card using the circle punch. Heavier card stock will work better.
Mark off three scallops with a pen, this will be the bodice of the dress.
Draw a line about 3/4" long between the marks, and about 1" down from the edge of the circle. This doesn't have to be perfect, just eyeball it.
Cut down from each mark on the edge of the circle to the end of the line you just drew.
Fold in about three scallops on either side of the dress bodice. Fold in at an angle so that the cut edge you made lines up along the line that you drew. Do this on both sides of the bodice.
Use a bone folder to sharpen the creases. This is especially important if you are using thick card... and it will save your fingernails!
Use one foam square to stick the dress flaps down.
Step 4: Tie Ribbon and Finish

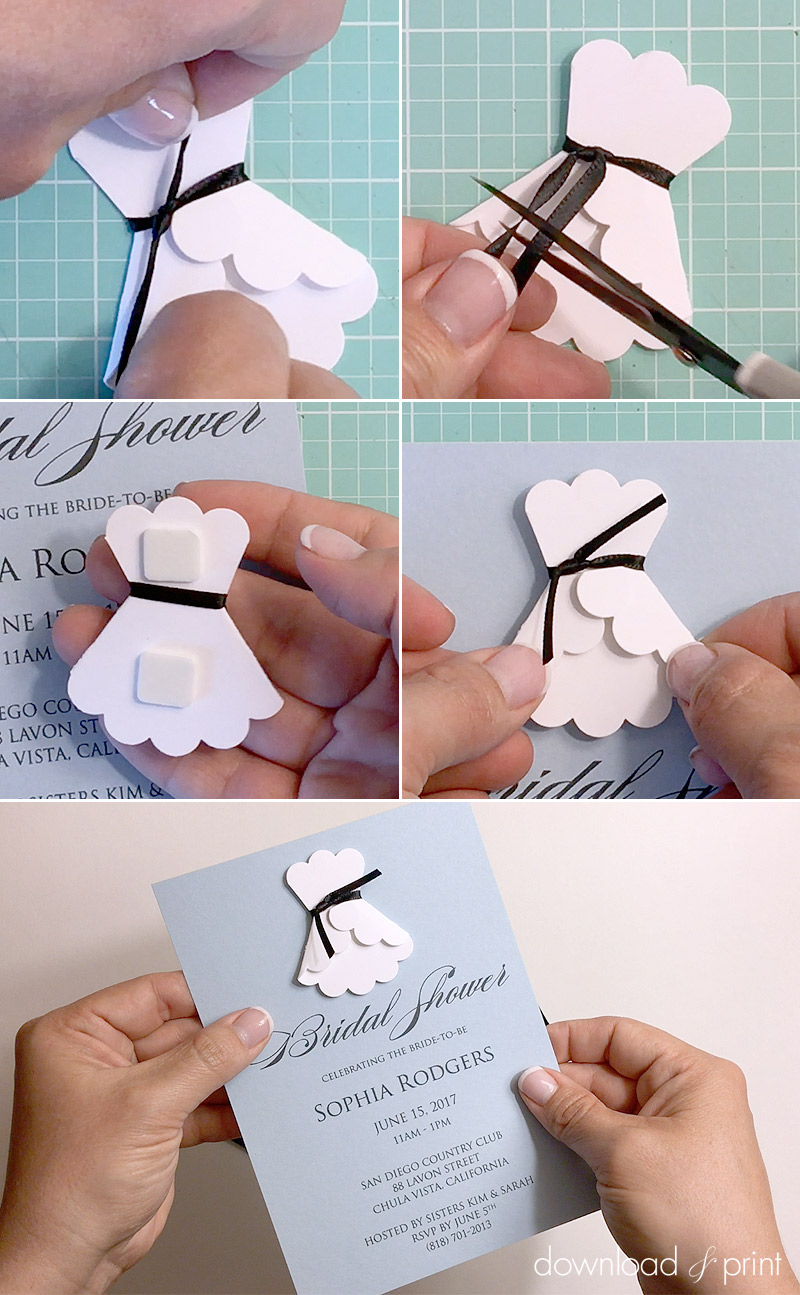
Loop a length of ribbon around the "waist" of the dress and tie it off with a simple knot. Cut the ribbon tails on the angle to finish them nicely.
Stick two foam squares on the back of the dress, one high and one low, and adhere the dress to the top of the invitation. I didn't measure exactly where to put the dress, I just eyeballed the center.
These pretty invitations are now ready for mailing.
With template love,
(Although all the products listed in this tutorial are products I personally use, I will be compensated just a tiny bit if you make a purchase through some of the links provided. Thanks for supporting small biz!)

